
npm publishing with GitHub Provenance
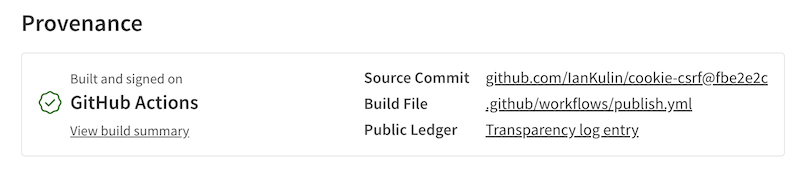
I’ve previously written about manually publishing a package to npm, but in these days of frequent npm (and other) supply chain attacks, it’s nice to see the official provenance badge at the bottom of any npm packages you are using, so let’s have a look at what you need to do that.
Manual Publish
The GitHub OIDC workflow publishing can only work after we’ve published the package manually, since we need to go into the settings for the package to set it up. So first thing is to publish it manually. I did cover that in the post mentioned above so I won’t go over it all, but here’s some points:
- Since I don’t do this all the time, I find it’s worth doing an
npm logout&npm loginto make sure my credentials are up to date. If they are not, when you try to publish you’ll get a 404 and a message likeThe requested resource 'cookie-csrf@0.1.1' could not be found or you do not have permission to access it. - I’m not sure if npm is forcing you to have a 2FA set up or not. If it is still optional, you’d be mad not to use it.
- There are some minimum requirements of what’s in the
package.json, I like to go past them and specify the files, repo links and some other nice stuff. They’ll be helpful later.
{
  "name": "cookie-csrf",
  "version": "0.1.1",
  "description": "A small, stateless pre-session CSRF protection middleware for Express unauthenticated routes",
  "main": "cookie-csrf.js",
  "types": "cookie-csrf.d.ts",
  "type": "module",
  "repository": {
    "type": "git",
    "url": "git+https://github.com/IanKulin/cookie-csrf.git"
  },
  "keywords": [
    "csrf",
    "express",
    "middleware",
    "security",
    "stateless"
  ],
  "files": [
    "cookie-csrf.js",
    "cookie-csrf.d.ts",
    "README.md",
    "LICENSE"
  ],
  "author": "IanKulin",
  "license": "MIT",
  "bugs": {
    "url": "https://github.com/IanKulin/cookie-csrf/issues"
  },
  "homepage": "https://github.com/IanKulin/cookie-csrf#readme",
}
npm publishwill spit some stuff out.- The success message will be the package name and version, something like
+ cookie-csrf@0.1.1
npm Package Settings
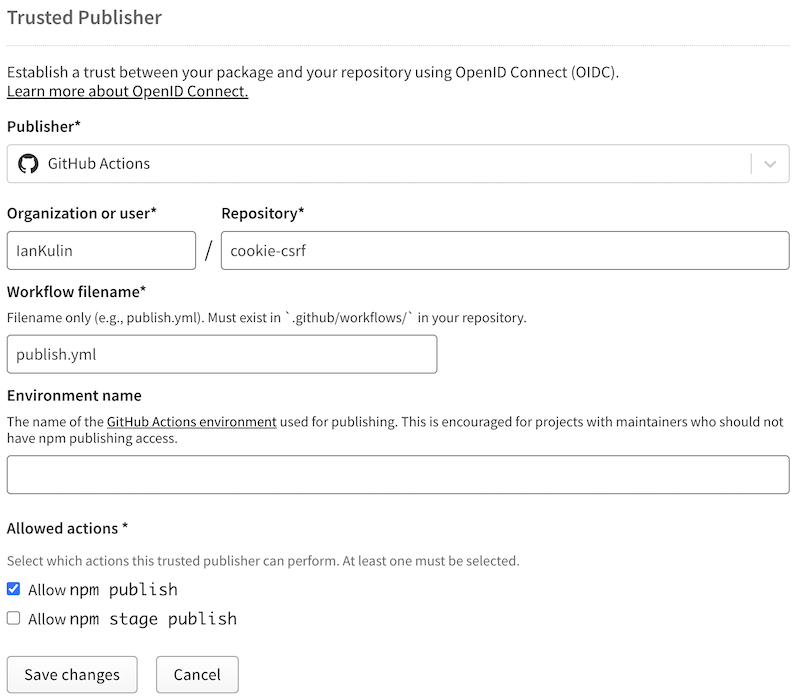
Now we need to tell npm who the authorised publisher is. Visit your package on the npm website - in the case of our example above, it’s going to be https://www.npmjs.com/package/cookie-csrf On the right hand side there’s the ‘Settings’ for the package, and in the settings is “Trusted Provider”. It will ask you who (we’re choosing GitHub Actions, but npm will be adding a few more).
Then we can fill out the details. As a solo dev, mine are straightforward.
- github org & package name
- workflow name (we’ll create the workflow in a minute)
- no need to limit to a particular workflow environment
- we’ll publish directly instead of staging it (if the package goes to staging, someone needs to log into npm to make it live)
Workflow setup
For GitHub to do something for us, we have to create a ‘workflow’. This is just a yaml file that tells GitHub what to do. These live in your project at .github/workflows. Here’s mine:
name: Publish to npm (Trusted Publisher)

on:
  push:
    tags:
      - "v*" # Example: v1.2.3
permissions:
  id-token: write # Required for npm OIDC authentication
  contents: read # Required to clone the repository
jobs:
  publish:
    runs-on: ubuntu-latest
    steps:
      - uses: actions/checkout@v4
      - uses: actions/setup-node@v4
        with:
          node-version: "24"
          registry-url: "https://registry.npmjs.org"
      - name: Ensure latest npm (supports OIDC)
        run: npm install -g npm@latest
      - name: Publish package to npm
        run: npm publish
The on: part tells github how this is triggered. I like mine to be triggered when there’s a new tag beginning with ‘v’. That way I can either push a tag from the command line, or go onto GitHub and tag a new release. It requires me to do something deliberate.
The rest of the file is self-explanatory; we give it the permissions it needs, GitHub creates a new environment, pulls the repo into it, then installs node and npm before publishing the package.
Workflow run
Once we trigger the workflow (in my case, by creating a release with a tag starting with ‘v’), it will run, and hopefully we’ll get an email from npm saying the package has been published. If you’re keen, or there are problems, you can see what the workflow is doing, or click on on it to see the output, by going into ‘Actions’ on the GitHub page for your repo.
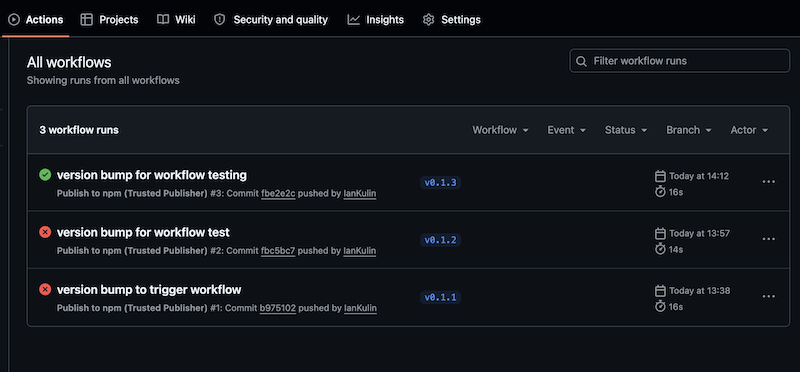
If it’s green, you’ll get the confirmation email from npm in a minute, and if you head to the npm page for your package and scroll down to the bottom you’ll see the “Provenance” section with a green tick from GitHub.
The magic of all this is that because npm knows exactly which repo the code has come from, a user can be confident to go to the repo and know they are looking at the code used in the package, and see which GitHub org and user is responsible for the code.